Wednesday, March 13, 2013

Getting My Nerd On

Wildlife park yesterday /BEAM the best birthdays happen there. To save bandwidth ;) eight of two hundred sixty pictures.


massive American Alligator


Dromedary Camel
there are a few in the park and a big, affectionate Bactrian named Bubba


Emu Chicks
I kind of want some. A lot.


Reticulated Giraffe
two adults and one baby in park; there are also two adult Rothschild giraffes


Ring-tailed Lemur


Watusi


Wildebeast


Plains and Chapman's Zebra


Previous animal nerdings here and here

Sunday, March 3, 2013

Covert Customer

While fully admitting I have a thing for tiny metallic purses, I have never been much for using them. In my teens and early twenties, I employed a trifold (this labeling convention drives me crazy, it only folds twice) wallet, which was fine and good until I flopped down on a super slide at the county fair and bruised the bejeezies out of my derrière. Post super slide, I continued to carry only that which would fit in my pockets, but after the 
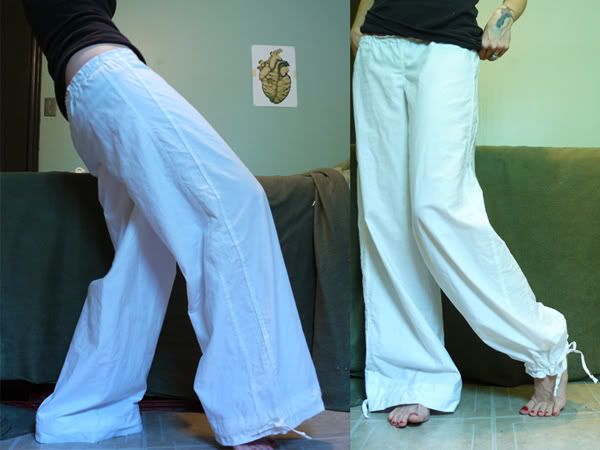
90s, the fit of my jeans improved, my carrying capacity was greatly reduced, and, while my phone became thin enough to carry comfortably in-pocket, my ID and money started sliding up from my back pocket when I would sit down. And, of course, I still had to resort to purse toting when having no pockets (or not wearing boots :p).

I have an outdoor adventure coming up where I will be carting my camera, need my usual pocketfill, and will surely be up and down as if I were attending mass, so I set to work on something to securely hold ze cash.


eee ♥ buns


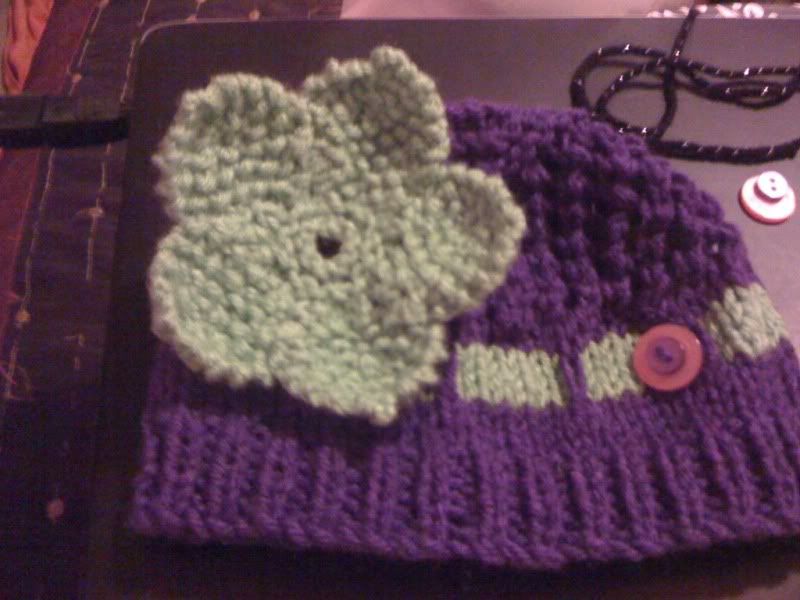
But this first go 'round wasn't quite doing it for me. The fabric and lining came out a little too thick, binding around corners never has been my forte, the shape itself wasn't making the tidiest fold or wrap... so I started my second pattern.


Thinner than the first, the overall finishing is much more favorable, the button was easier to work one handed than the D-rings, but the buttonhole is sloppy (thanks to my love of giant buttons), the pattern size didn't lend enough overlapping and would limit the wearer's wrist measurement to 6" - 6.5", and along with preferring a more universally sized pattern, the interior is too narrow for a credit card/ID.

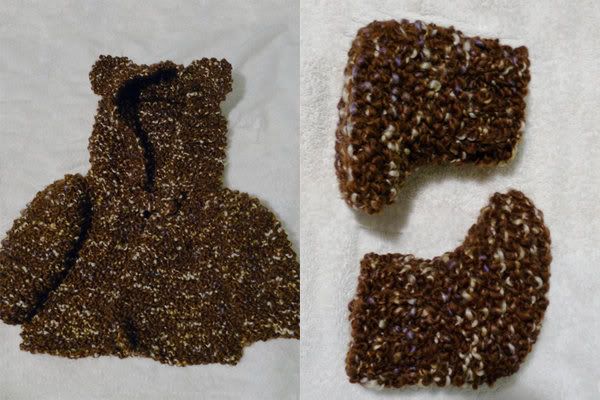
Third time's the charm...


... maybe :p I'm waiting on snaps and a snap setter before officially calling it successful, but it's a full 1.25" longer than its predecessor, which ought to allow space to set snaps for 6", 7", and 8" wrists. We will see.

Saturday, February 23, 2013

In Bloom: Episode 2: Construction

In Bloom: Episode 1: Pattern Drafting

Fabric time!
Notions:
woven cotton fabric*
1/2" wide, soft stretch elastic for waist
1/4" wide, soft stretch elastic for legs
scissors
pins
needle/sewing machine
thread

optional
chalk/marker for tracing pattern to fabric
seam tape
pinking shears
safety pin for threading elastic through waist and legs

*45" wide fabric ought to work for hips/thighs up to 60" (if my other estimations are on) and use less than one yard to make a pair of bloomers. HOWEVER, those with larger measurements can always use a length of fabric to match the width of the pattern, turn the pattern vertical on the fabric, and, provided the total length of the pattern does not exceed 22", cut the two pieces side by side. When in doubt, draft your pattern before choosing fabric :)

Dig through your stash, get down to the thrift, or head to your favorite fabric store and gather your bobs 'n bits. Be sure to wash fresh-from-the-shop fabrics in the same manner you will be laundering your bloomers to remove starch, sizing, and to show the fabric how things are going to be :p Once you have it clean and dried, give it a once over with the iron to get it flat and remove any wrinkles.


Fold your fabric, right or wrong sides facing, in whichever direction works best with your pattern piece.


Place your pattern on top of your fabric, avoiding the selvage, and either pin the pattern to the fabric, then cut or, my preferred method, trace the pattern to the fabric with chalk/marker, pin all along the inside of the pattern, paying extra attention to the curves at the crotch, and cut out the two pieces of your bloomers.


You could also cut them separately, just be sure to flip the pattern to the reverse side for the second piece.


Sewing
With right sides facing each other, pin along the rise and crotch of your bloomers, placing a tighter grouping of pins around the curves.


Sew pieces together using a straight stitch, leaving a 1/2" seam allowance. Just to the outside of the stitches (in the seam allowance), follow the same line with your zigzag stitch**. Trim the excess seam allowance, minding the stitches, and clip the curves.


At this point you may want to open up the fabric, press the seam allowance to one side, and either stitch it down or cover it in seam tape so as to not have a pokey seam in your privies. **If you are sewing by hand, instead of grueling through zigzagging, you will still want to clip the curves, but could use pinking shears to trim the allowance or hold off on fray management until pressing and stitching/using seam tape.

Because they don't really lay flat, I'm having trouble rendering an image... dimensional drawing in photoshop is hard :p SO, when looking at your bloomers as such, front(s) facing left, the fabric facing up will be the left side of your bloomers.


Kind of like this...


... but not.
Moving on...

Fold the back under the front, with right sides facing each other; pin left and right side seams together. Since the back is wider than the front, the side seams will not automatically align, so just pull 'em together.


Treat the side seams as you did the rise/crotch by straight stitching with 1/2" seam allowance, then zigzagging, trimming, and pressing. You could also use seam tape here for a more finished interior.

Waistband!
Fold in the top of your bloomers 1/2" and press. Fold in again, this time 1", press. Starting ~1" from center back, with a ~3/4"seam, stitch around the waist, stopping short of the center back seam.


Grab your 1/2" elastic and wrap it around where the waistband will sit on your body. You'll want it to stretch some, but also be comfortable. Cut the elastic with a 1" overlap, poke your safety pin through one end, and thread it through the waistband channel, keeping the elastic flat.


Once all the way through, holding both ends of elastic, scrunch the fabric down to give yourself some working room, overlap the elastic 1", and stitch it together. Stretch the waist of your bloomers so that the elastic goes into the channel and stitch the gap closed.

Repeat the 1/2" and 1" folds for both legs. Starting from the inside of the legs, stitch as close to the edge of the fold as you can (almost a 1" seam), leaving a gap for the elastic, on both legs. Make a second hem using a 1/2" seam, forming a ~1/2" channel, stitching all the way around.


Get your 1/4" elastic and fit it comfortably around each thigh with a 1" overlap. Using your safety pin, thread elastic through both legs; stitch elastic together; stretch leg(s) to pop elastic into channel(s); and sew channel(s) closed.

Turn 'em right side out and you're done!

Yay! <3

Monday, February 18, 2013

In Bloom: Episode 1: Pattern Drafting

I am sure there are more sophisticated ways, replete with technical terms, to do this, but I offer you my method :) Once you have the pattern drafted, it is easily modified for full-blown, wide leg pants.

Basic Bloomers

Supplies:
news/tissue/other scrap paper for pattern
flexible measuring tape
ruler
pencil/pen/marker


Measuring:
Determine the widest point (build depending, typically hips, but sometimes upper thighs) and measure circumference. My measurement is 36" (for example purposes). Divide this number in half (18"), then into 5ths, giving 2/5 to the front and 3/5 to the back, rounding each measurement up to the nearest inch.
18" / 5 = 3.6"
3.6" x 2 = 7.2", rounded to 8" + 1" (seam allowance) = 9" front width
3.6" x 3 = 10.8", rounded to 11" + 1" (seam allowance) = 12" back width
Note the resulting numbers.

Second measuring point, depth of crotch -- important for comfort! Take your measuring tape, hold the zero mark with one hand; thread 'er between your legs; sit on a firm, flat surface; and find where the tape just sticks out from under you. For example purposes, my measurement was 8". Subtract 1" from this measurement.
8" - 1" = 7" crotch depth
Note the number.

Third and fourth measurements, front and back rise. Measure from where you want the waist of your bloomers to sit, front and back, down to where the tape truncated when measuring your depth of crotch. My measurements were 5" for the front and 7" for the back. Add 1.5" to this measurement for the waistband.
5" + 1.5" = 6.5" front rise
7" + 1.5" = 8.5" back rise
Note these numbers.

Annnd fifth measurement, inseam, measure from your crotch down to where you want your bloomers to stop. I wear mine fairly short, unless I intend to wear them as outerwear, so my inseam is 2". Add 1.5" to your inseam measurement for the hem.
2" + 1.5" = 3.5" inseam
Note this number.


Drafting:
Add together your front width, crotch depth, and back width numbers to make your total width.
9" (front w) + 7" (crotch d) + 12" (back w) = 28" total width
Add together your back rise (which is usually longer than the front, if not, use front rise instead) and inseam measurements to make your total length.
8.5" (back r) + 3.5" (inseam) = 12" total length
Draw a [rectangle] to these measurements on your [pattern paper].


At the top of this rectangle, working from left to right, mark front width, crotch depth, and back width.


From the marks on either side of the crotch, measure and mark your back rise (or longest rise) measurement and draw another line connecting the two at the bottom. Measure this bottom line to ensure the two vertical lines remain evenly spaced.


Round the two corners made in the crotch.


Cut out this section.


Subtract your front rise (shorter rise) from your back rise (longer rise), divide this number by 2; measure down from the top left and top right of your pattern and mark this measurement.
8.5" (back r) - 6.5 (front r) = 2" / 2 = 1"


On the front (or will-be shorter rise) side of the crotch, measure from the bottom of the crotch up to the length of the front rise and mark.


Draw straight lines connecting the front rise mark to the mark made on the left and the back rise to the mark made on the right.


Cut off these two sections.

Et voila! Pattern. As shown, this will make the left side of your bloomers; flip the pattern to the back and it will make the right side :)

Episode 2: Construction ... coming soon.

Friday, February 15, 2013

Your Move, Valentine

Every year, I whip up some sort of cheesiness for Valentine's. This year is no exception...


laced crotch(less) bloomers

Ehehehe, tacky-cute, non? I was practically hysterical while putting them together. Bloomers, in general, make me laugh (I'm not sure where my bloomer fixation originated, butI love making and wearing them), doing this to them was enough to send me over the edge XD

Pointless trivia: between 1800 and 1900 bloomers/drawers were commonly crotchless/split. Unfortunately (for them), minxiness was not behind the design.

Sunday, February 3, 2013

Schmooper Bowl

It has warmed up considerably -- almost seventy degrees! ... but I still want hibernation food >.> especially spicy chocolate.

Crinkle Cookies


dried Valencia orange peel + cinnamon + cayenne
cinnamon + confectioners sugar
confectioners sugar


3/4 c coconut (or other light/unflavored) oil
1-3/4 c turbinado sugar
1 c cocoa powder (the darker the tastier!)
1-1/3 c unbleached all purpose flour
1 c whole wheat flour
1 tsp baking powder
1 tsp baking soda
1/2 tsp salt
2 tbs Ener-G
3/4 c warm water
2 tsp vanilla extract
powdery stuffs for coating (not included in nutrition)
Obviously, I used the coatings listed below the picture, but I also thought about using ground ginger, masala chai spices, cocoa powder, homemade mint cocoa mix, powdered instant coffee, and curry powder... but I didn't want to clean 20,000 tiny bowls. I think they would all be delicious! The powdered sugar makes the cookies a little too sweet for my tastes, so I will skip it as a coating and not mix it with the cinnamon in the future. The orange+cinnamon+cayenne are to. die. for. If you're into that sort of thing ;)


I'm convinced chili+chocolate was discovered just for me.


In a large mixing bowl, using a hand mixer, beat together oil and sugar; add cocoa and beat again. In a separate bowl, stir together flours, baking soda, baking powder, and salt; set aside.

Measure Ener-G into blender carafe; slowly pour warm water over Ener-G; blend until foamy. Pour Ener-G mix and vanilla into cocoa mixture, beating to fully incorporate.

Begin beating flour into the cocoa mix a little at a time. About half-way through the dough will probably become too stiff for the hand mixer and the remaining will have to be mixed by hand.

Cover dough in plastic wrap and chill (at least) 6 hours.

Preheat oven to 350° Fahrenheit and lightly grease a cookie sheet. With a large, non-serrated knife, cut dough in half, re-wrap one half and stick back in the fridge. With the remaining half, cut into 32nds (divide dough in half three times -- 2 pieces to 4 pieces to 8 pieces -- then cut each of the 8 pieces into quarters) and roll each piece into a small ball.

Roll each ball into coating(s) of choice and place on cookie sheet. Bake 10-12 minutes or until tops are cracked and edges are firm to slight touch. Allow to cool on sheet a minute or so, then transfer to wire racks to cool completely. Repeat with second half of dough.

Servings: 32 | Serving Size: 2 cookies | Calories: 122.1 | Total Fat: 5.5 g | Cholesterol: 0.0 mg | Sodium: 90.7 mg | Potassium: 41.2 mg | Total Carbs: 16.3 g | Dietary Fiber: 1.5 g | Sugars: 10.6 g | Protein: 1.5 g | Vit. A: 0.0% | Vit. C: 0.0% | Calcium: 2.4% | Iron: 3.1%
Full nutrition can be found here.

K. Time to take advantage of Big Game Day and hit the stores \m/

Wednesday, January 30, 2013

C is for Cookie

These went so fast I had to make growly noises to get a picture of (and eat :p) the last three.

Cinnamon Sugar Cookies


queue coffee!

3/4 c whole wheat flour
3/4 c unbleached all purpose flour
1/2 c turbinado sugar
1/2 tsp baking soda
1/2 tsp salt
1/2 c coconut oil (or other light/unflavored)
1-1/2 tsp Ener-G egg substitute + 2 tbs water
1 tbs maple syrup
1 tbs vanilla extract

1/3 c turbinado + 2-3 tbs ground cinnamon to coat

If you don't have Ener-G on hand, I'm sure any egg replacement (to the equivalent of 1 egg) will do.

Preheat oven to 375° Fahrenheit. In a medium mixing bowl, combine all of the dry ingredients, stirring well. In a smaller bowl, whisk together the wet ingredients. Add the wet mix to the dry and stir until fully incorporated.

Using rounded teaspoons, form dough into ~3/4" balls; roll balls in cinnamon/sugar mixture; place on an ungreased cookie sheet and flatten slightly. Bake 7 - 9 minutes, or until juuust firming up on edges. Cool on sheet 5 minutes, transfer to wire racks.

Servings: 12 | Serving Size: 2 cookies | Calories: 194.3 | Total Fat: 9.3 g | Cholesterol: 0.0 mg | Sodium: 150.1 mg | Potassium: 13.8 mg | Total Carbs: 23.5 g | Dietary Fiber: 2.1 g | Sugars: 14.7 g | Protein: 1.8 g | Vit. A: | 0.1% | Vit. C: 0.8% | Calcium: 3.1% | Iron: 5.2%
Full nutrition can be found here.

Mmm, cookie.

Monday, January 28, 2013

For Daysss

It's what's for dinner.

Chili

with Galaxy Foods Veggie Shreds cheddar, of course


1-1/2 c dried red kidney beans
1-1/2 c dried black beans
1/4 recipe seitan "beef" (see below)
28 oz can crushed tomatoes
24 oz tomato paste
# cloves garlic (whole head!), peeled & crushed
1 medium onion, diced
1 green capsicum, diced
1 c water
1/4 c ground cumin
2 tbs chili powder
1 tbs smoked paprika
1 tbs black pepper
2 tsp cocoa powder
2 tsp molasses (agave/honey/brown sugar)
1-2 tsp cayenne (only 1 if children are involved)
1 tsp salt
1 tsp cinnamon
1 tsp liquid smoke


On the day before, prepare Seitan Beef:
2 c wheat gluten
2 tbs whole wheat flour (additional flour may be needed if dough is too moist)
1/4 c nutritional yeast

1-1/2 c cold water
1/2 c shoyu (tamari or Bragg's Liquid Aminos)
1 tbs tomato sauce (or ketchup)
1 tbs. olive oil
2 cloves garlic, minced
3/4 tsp. lemon juice

cooking broth:
12 c. cold water
1/2 c. low-sodium soy sauce

In a large bowl, mix drys (first 3 ingredients) thoroughly. In a separate bowl, combine the rest of the ingredients, stirring well. Pour wet mix into the dry mix and stirstirstir. Form [goopy dough] into a loaf and set aside.

Bring broth to a boil then reduce heat to simmer. Cut "loaf" into 6-8 pieces and, once broth is no longer boiling, lower the pieces gently into the broth; cover pot with lid and simmer for an hour(ish) -- pieces will float once finished cooking.

transfer seitan from pot of broth to colander to drain thoroughly. Set somewhere out of the way to cool completely (makes a "meater" substance).

Once cooled, pat dry and divide into [storage containers] for freezing (keeps indefinitely) or refrigeration (keeps 7 days).

Servings: 12 | Calories: 170.4 | Total Fat: 2.0 g | Cholesterol: 0.0 mg | Sodium: 370.2 mg | Potassium: 104.4 mg | Total Carbs: 8.9 g | Dietary Fiber: 1.0 g | Sugars: 0.1 g | Protein: 30.3 g | Vit. A: 0.1 % | Vit. C: 0.6 % | Calcium: 5.9% | Iron: 12.8%
Full nutrition can be found here.
and soak dried beans overnight in a no smaller than 5 quart stock pot -- it will barely fit in the 5 ;) In the morning, drain and rinse beans, put 'em back in the pot, then cook according to package directions (ie. simmer in 6 c water -- with lid... my package didn't say as much -- for 1-1/2 to 2 hours). Once the beans have finished, you can begin your chili (in the same pot).

Add everything except the seitan to your bean pot and stir well. Cut seitan into little chunks, stir into mixture. Set your burner to low, put a lid on it, and let 'er ride, stirring every 30 minutes or so, for 3 hours.

Servings: 13 | Serving Size: 1 c | Calories: 200.5 | Total Fat: 1.4 g | Cholesterol: 0.0 mg | Sodium: 417.8 mg | Potassium: 668.1 mg | Total Carbs: 38.6 g | Dietary Fiber: 13.7 g | Sugars: 9.3 g | Protein: 15.9 g | Vit. A: 36.1% | Vit. C: 33.1% | Calcium: 10.4% | Iron: 29.0%
Full nutrition can be found here.

Takes some time to make, but toootally pays off in not really having to cook for days. Serve with cornbread, corn chips; over fries, baked potatoes; or any other way you can conceive.

Chili forever!!!

Friday, January 25, 2013

The Best Time to Start

... is when you are supposed to be doing something else.

Obviously, I am an obsessive planner, but the one thing I absolutely loathe is writing up our weekly dinner menus. Or, rather, the limitations. When I first think dinner I have a head full of color and texture, but, when faced with the actualities of budget and dietary restrictions*, it loses its luster.

* When the Mister and I began dating, he was straight up meat 'n' taters... seriously, his only vegetable consumption consisted of potatoes and, occasionally, creamed corn. Having gone veg*n, he has had to stretch and (reluctantly) eats a number of veggies now, but still has an unadventurous palate.

So, yesterday, rather than spend my morning trying to sneak interesting things into our meals, I opted to rearrange our bedroom in order to make room for some good, old fashioned, floor cushion meditation.


before


after


Yes, still quite cluttery, but what can you do? No. I will not use the closet... in my mind, it has already become the bathroom expansion ;) Didn't get the AMAZINGAMOUNTSOFSPACE I was hoping for, but it *is* more than we had, plenty for some floor sittah, and, perhaps, a spot for the resumption of exercise? Eh, self? Remember exercise? Wasn't that nice?

We did, even without my enthusiasm, wind up at the grocers and came home with what I hope will be filling and satisfying, while not terribly interesting, food.

Tuesday, January 22, 2013

Extra-Spectral


These turned out larger than I had anticipated. As planned, I didn't want much stretching for optimum warmth (which I indeed accomplished!), but they are easily big enough for my son's US size twelve and a half feet. So, it's back to the drafting board on gauge and I intend to change up the sole -- the garter sole is too rolly(?) ... needs more structure.

I do, however, like the four row slip-stripe on the sides and back. It looks a little strange, I admit, with the plain stripe panel in the front, but I was going for a multi-use pattern, leaving a place for cabling in a single color yarn. In my second draft, I was using a two row slip-stripe, which produced a very dense and interestingly patterned fabric. May revisit that idea on the next go, should I dig out another bundle of oddball leftover yarn -- would definitely make a sturdier sole -- and, given my unjustified fears of not fitting, could possibly work after all.

Wednesday, January 16, 2013

Commitment Issues

My darling man-child got himself into a spot of trouble on New Year's Eve, resulting in a ticket and court date, set for January fifteenth. Being that I still mother him (ever so slightly, mind), it was a court date for the whole family... which pretty well had me in knots as soon as I realized it was quickly approaching.

Social commitments are not my strong suit, as, for some years now, I have fought with panic/anxiety which is predominantly triggered outside of our home, almost always when waiting or being still. I realize court probably isn't considered social to many, but, to myself, it involves the same readying... the dressing process, having conversational topics, and bringing something to do should a lull present itself.

For this engagement, I started on an idea I had whilst doing the Christmas makery, which was inspired when knitting a little hat for a friend's niece.


petal: a neutral based beanie for little heads with interchangeable flowers and bands


charcoal heather hat; bands/flowers in soft pink, sage, and grape


I kind of love it. ... but I love most things involving the infliction of absurdity on children :D And, now that I am looking at it, I see the idea can totally be expanded to encompass a propeller beanie! ;) YAY